サラウンドビューカメラ 取付事例 02
某ボディ架装メーカー様での施工事例です。
ボディ架装と一緒にカメラの取付が出来るため、メーカー純正品のように違和感なく綺麗に仕上 がっています。
特筆すべき点は、左右のカメラの取り付け位置です。俯瞰映像を映し出すためには、ボディの最上部は理想的な高さです。しかも、外に飛び出すことなくボディ側面に面一で収まっています。
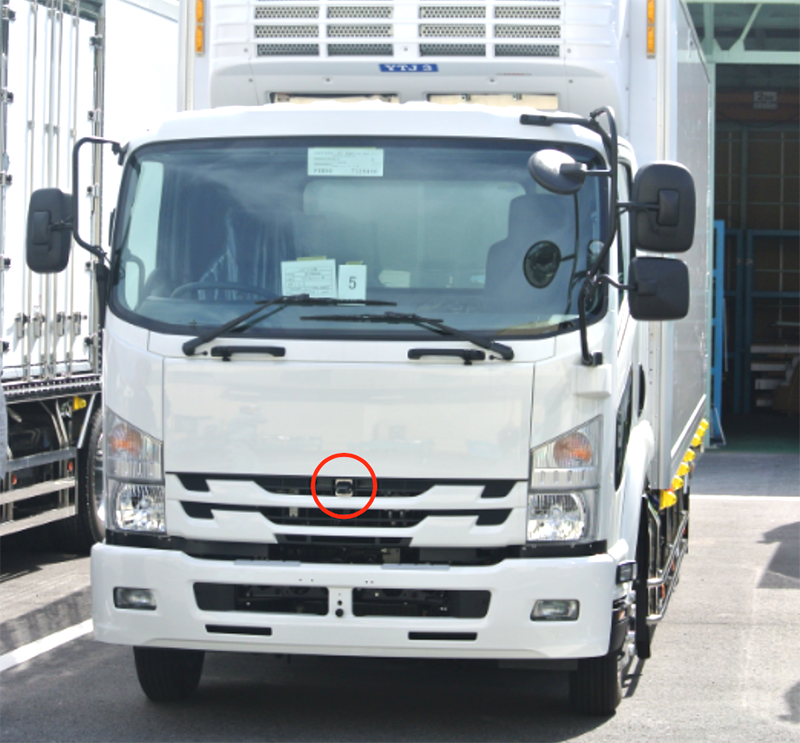
「フロントカメラ」
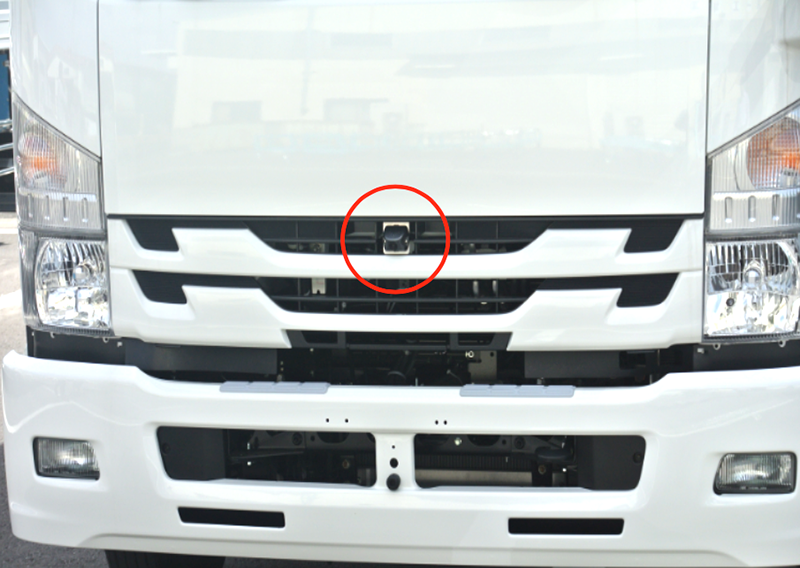
フロントグリル内に設置
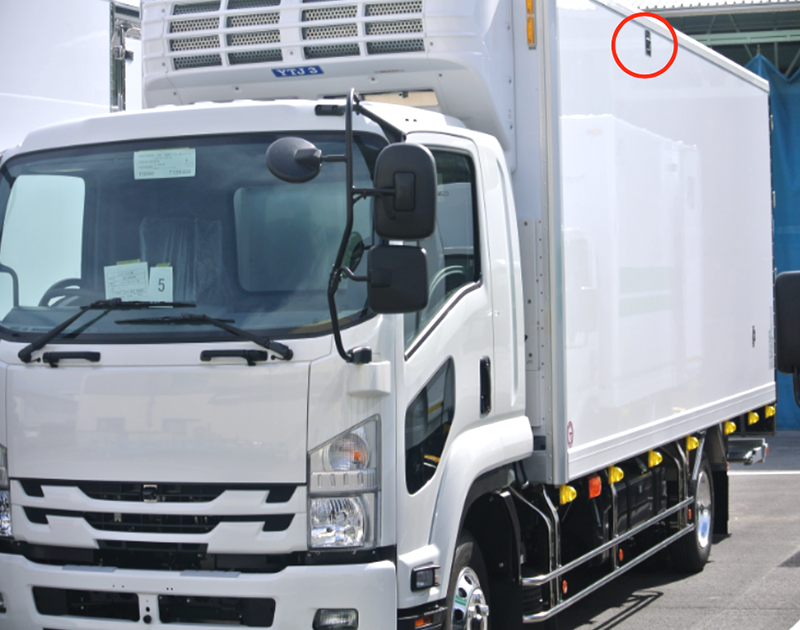
「左サイドカメラ」ボディ最上部に埋め込み設置。
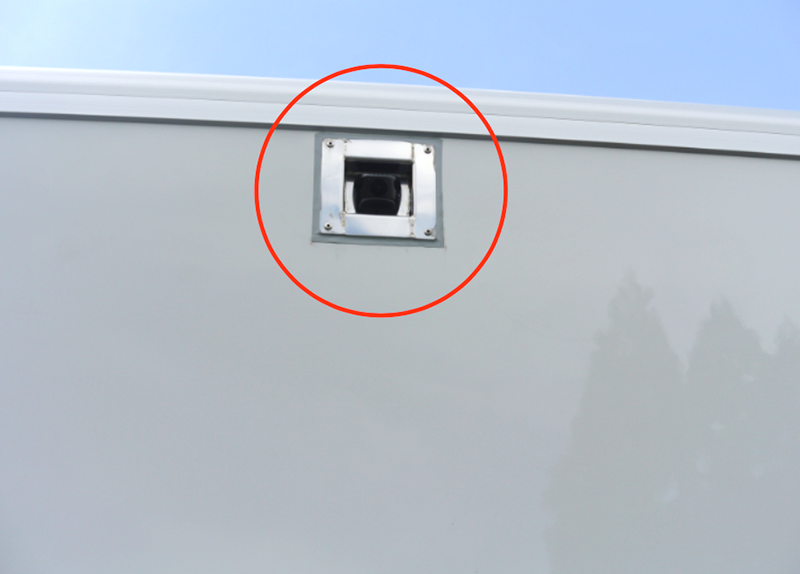
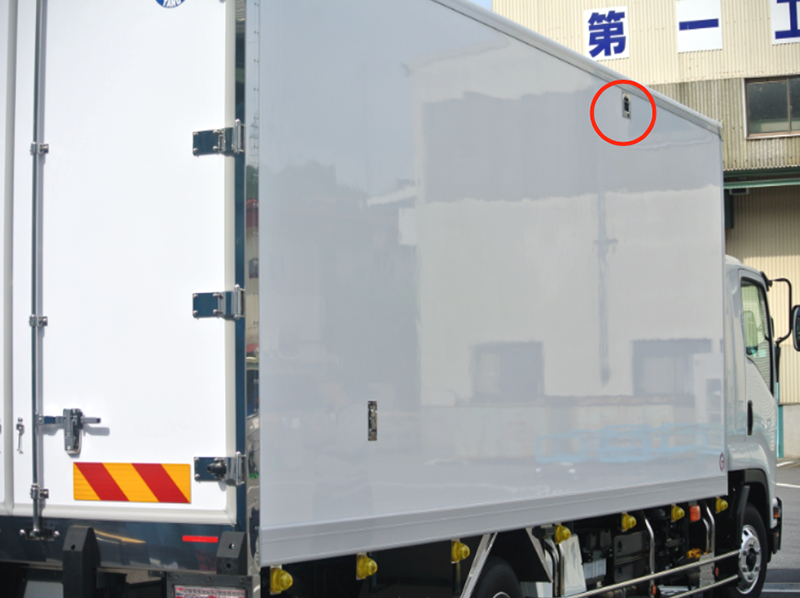
「右サイドカメラ」ボディ最上部に埋め込み設置。
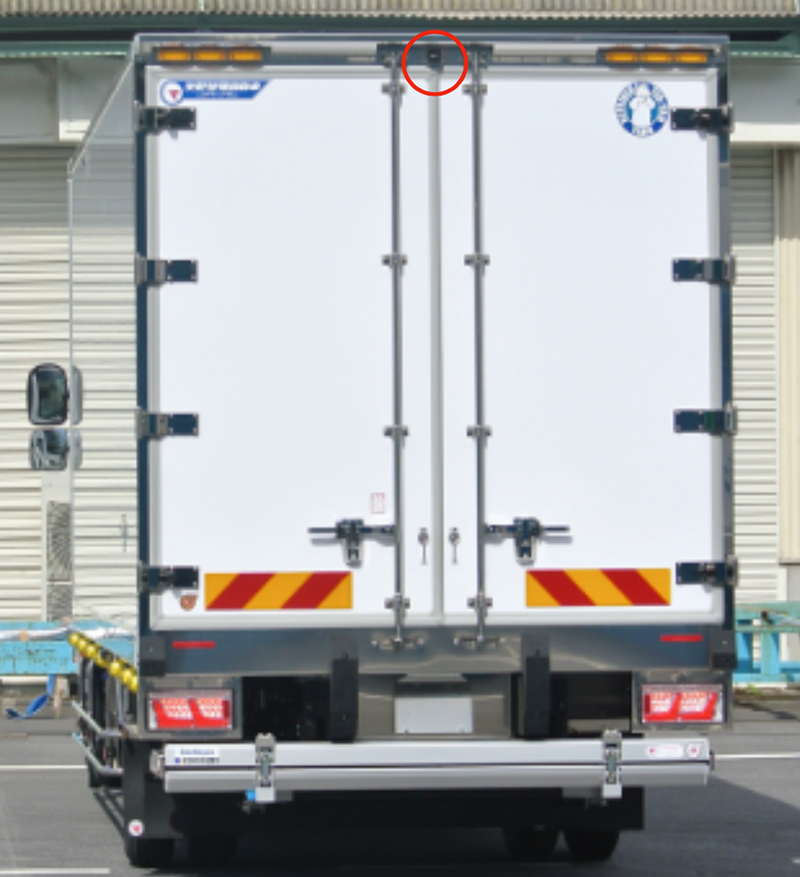
「リアカメラ」ボディ最上部に設置。
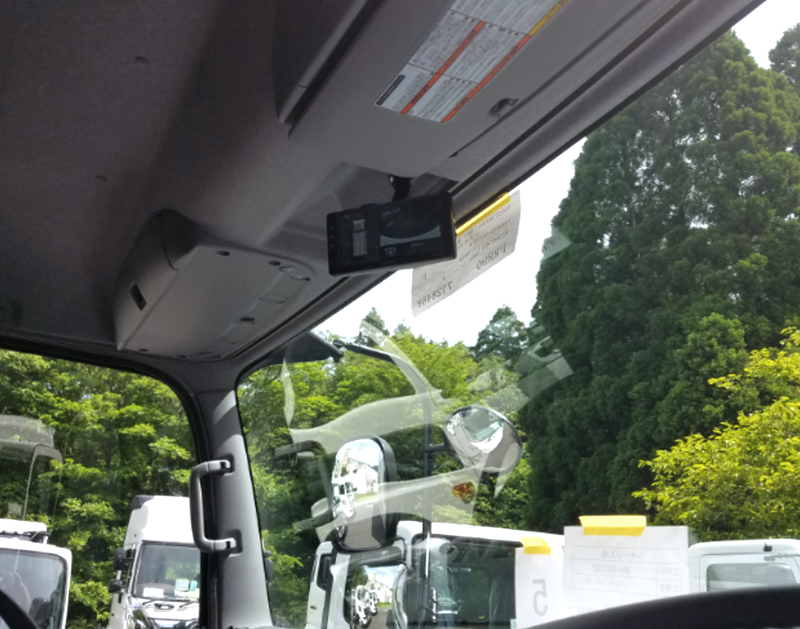
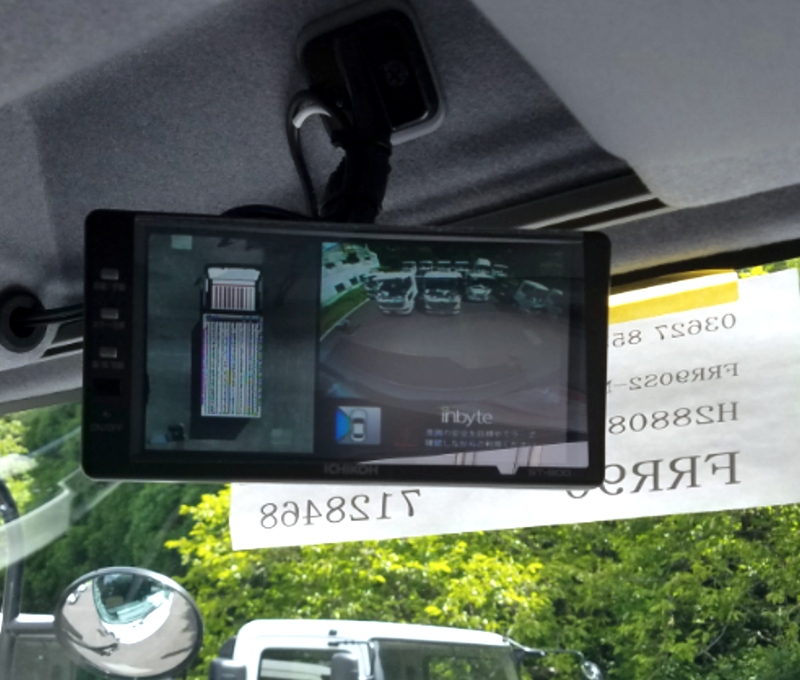
「モニター」ルームミラー位置に設置。
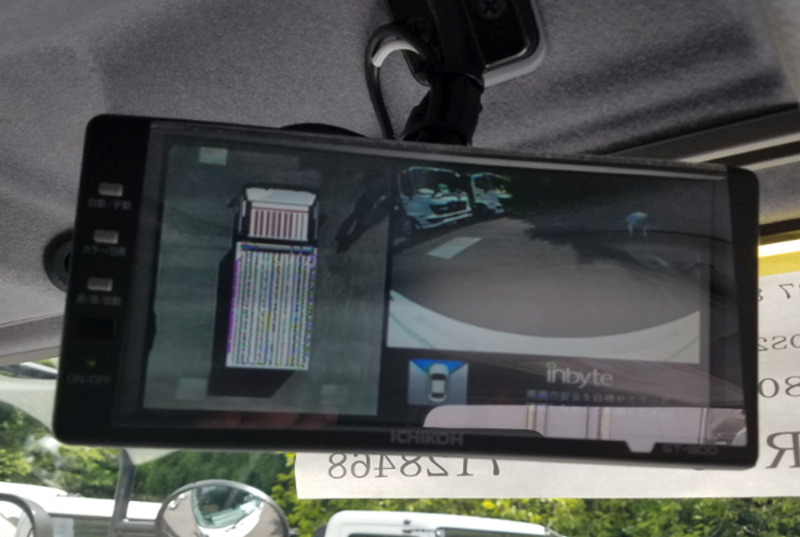
「「モニター」左側がサラウンドビュー、右側がフロントカメラ映像。

「モニター」左側がサラウンドビュー、右側が右カメラ映像。
「モニター」左側がサラウンドビュー、右側が左カメラ映像。
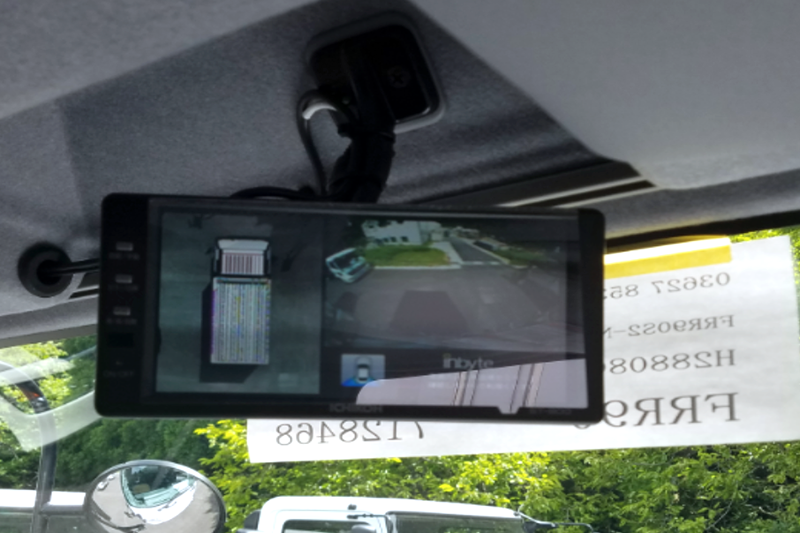
「モニター」左側がサラウンドビュー、右側がリアカメラ映像。